
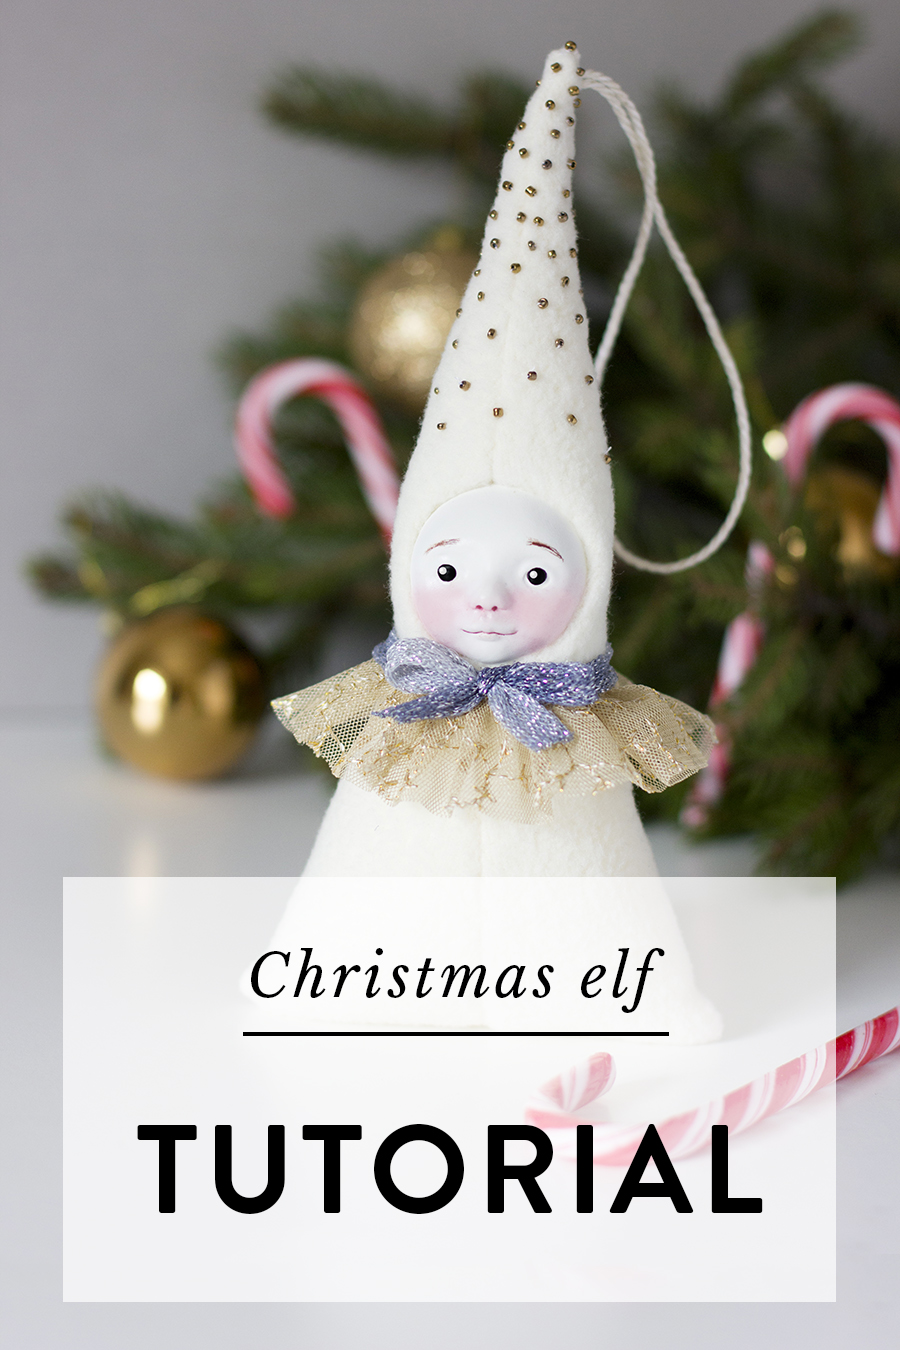
Peculiar Christmas elf tutorial
With a calendar packed with holiday's preparations, it can be tricky to make room for crafts or DIY projects. But handmade gifts could be so much better! Because of that, I've prepared a fun and easy Christmas elf tutorial that will get you into the holiday spirit in no time. This tutorial is suitable for beginners and will take you no more than a weekend to create. Add a little bit of character to your Christmas decor with this festive stocking stuffer!
This post contains affiliate links and I will be compensated if you make a purchase after clicking on my links. I wouldn’t promote anything I don’t absolutely love!
Materials
Modelling clay - I recommend using air-dry clays like “Creative Paperclay“ or “La Doll”. These clays are easy to work with and extremely lightweight. Read more about my favourite clays here.
Various tools for sculpting - you don’t necessarily need a lot of sculpting tools if you don’t want to invest, use what you have around the house: blunt knife, chopsticks, brushes, spatulas and your fingers!
Sanding paper - to achieve the smooth finish of the face you’ll need to sand your sculpture.
Paints - acrylics, watercolours and pastels are my mainly used paints for painting dolls.
Clear glue - I’m using Moment "Crystal", which leaves no traces of glue and is flexible, so doesn't ruin the fabric.
Matt varnish - to seal the paint on the sculpted face and protect it from the environmental factors.
Fabric - the fabric should be a little bit stretchy.
Polyester toy stuffing - to fill the bodies.
Decorations - ribbons, beads, buttons. Whatever your heart desires!
Making the face
Sculpt the head that would be around 7cm (~2,8'') length and 6cm (~2,4'') width. To make the head lighter I use half of the styrofoam ball and then I add clay on top of it. When the clay dries, sand it to the smooth finish and coat with white acrylic paints. To paint the face, I'm using soft pastels, watercolours and a matt varnish to seal the paints after each layer.
If you need more thorough instructions on how to sculpt and paint a doll's head, check this tutorial!
It has almost 100 beautiful and informative photos, 25 pages of step-by-step instructions, comprehensive lessons about sculpting and a printable sewing pattern to make those cute angels. There are 14 pages of instructions just about sculpting and painting alone!

Tracing the pattern
Download and print out the sewing pattern for this doll. Cut out the piece and trace on the fabric you like.

Cut out one regular and one mirrored piece.

Sewing it together
Take both pieces and sew them together as shown in the picture. Don't forget to leave the opening for the string!

To sew the bottom part, move the side seam to the middle and sew the bottom as it's shown in the picture.

Stuffing the doll
Take some polyester toy stuffing and fill the doll. Don't stuff it too much, it will look and feel better if it will be squishy.

Attaching the face
This part can be a little bit tricky for the first time so don't worry if something goes wrong, you'll get the hang of it! Add a little bit of glue to the top of the head and insert it into the opening. Make sure that fabric folds and sticks to the glue. Keep folding fabric and adding glue until all sides of the face are glued.

Attaching the string
Because this doll doesn't stand on its own I'm attaching the string. You can hand this elf on your Christmas tree or on the mantel, together with the Christmas stockings.
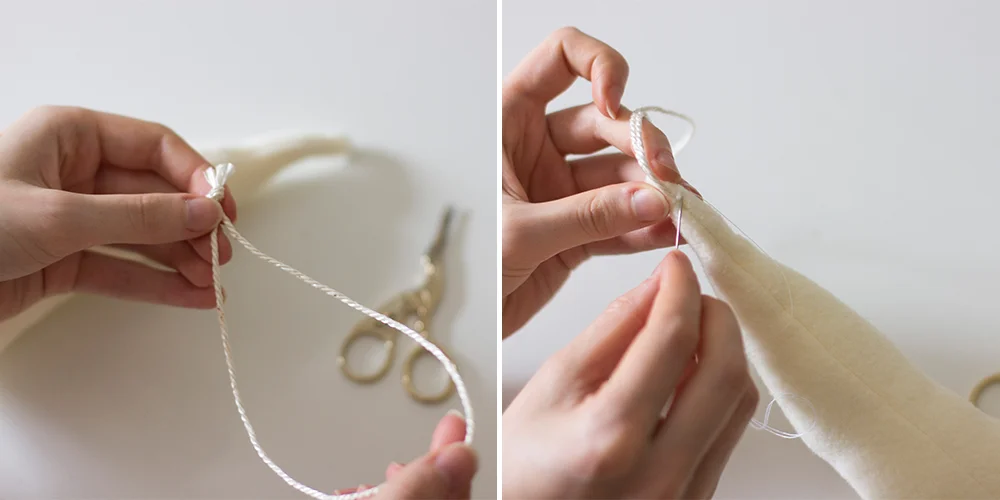
Tie the string to form the loop. Insert it into the opening and sew the hole with the ladder stitch.
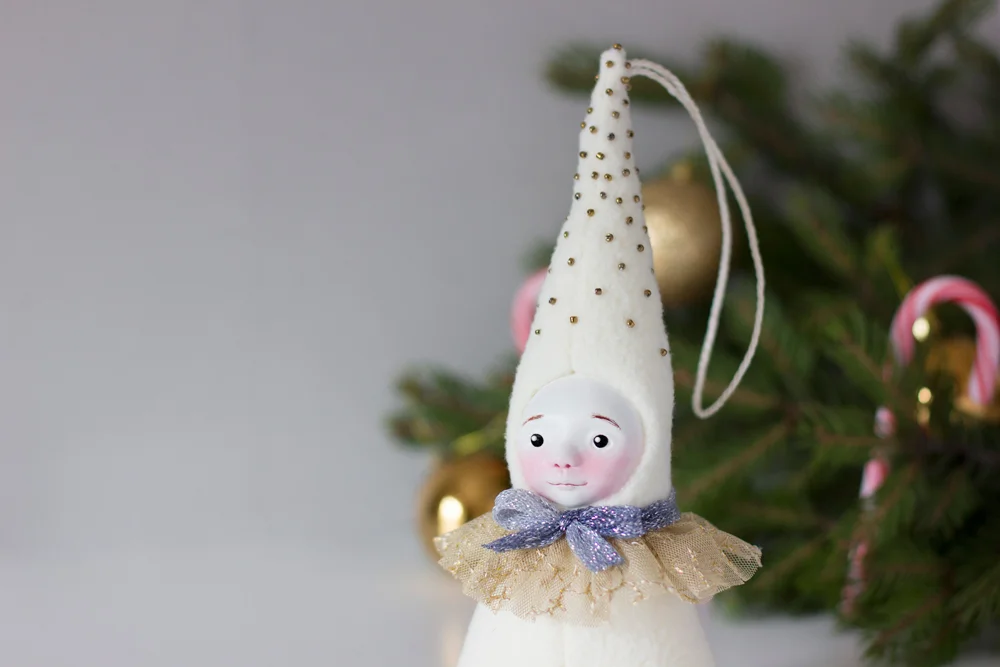
Decorating
These steps are completely optional! I've decided to decorate my elf with beads and embroidered collar. You can use whatever you like: beads, buttons, ribbons, patches, etc.

To make the collar I use two pieces of embroidered fabric.

I also add some metallic beads to the elf's hat, attach the collar, a ribbon and it's done!
I hope you've enjoyed this Christmas elf tutorial as much as I did making it. Let me know if you have any questions, I'm happy to help! Also, I'd love to see your creations so tag me in the photos of your cute Christmas elves.